Spatiotemporal Co-registration
1 Introduction
The GPlates' co-registration layer allows users to combine two time-dependent datasets based on a set of user-defined associations. To put it simply, co-registration is the collection of data at certain points in a file such as a raster (can be another dataset type), and transporting this data to another file. The points are decided in reference to a base file.
2 Co-registration Layer
2.1 Open Co-registration Layer
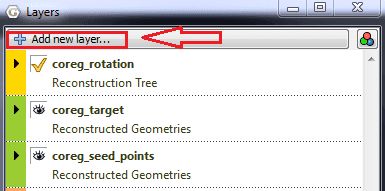
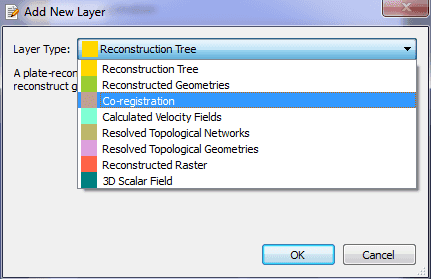
In "Layers" widget, click "Add new layer…" button. The "Add New Layer" dialog will pop up. Click the "Layer Type" combobox and select "Co-registration" to add a new co-registration layer.
2.2 Configurate Co-registration Layer
In "Layers" widget, expand co-registraion layer and add appropriate connections.
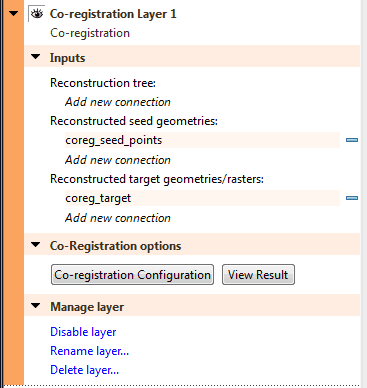
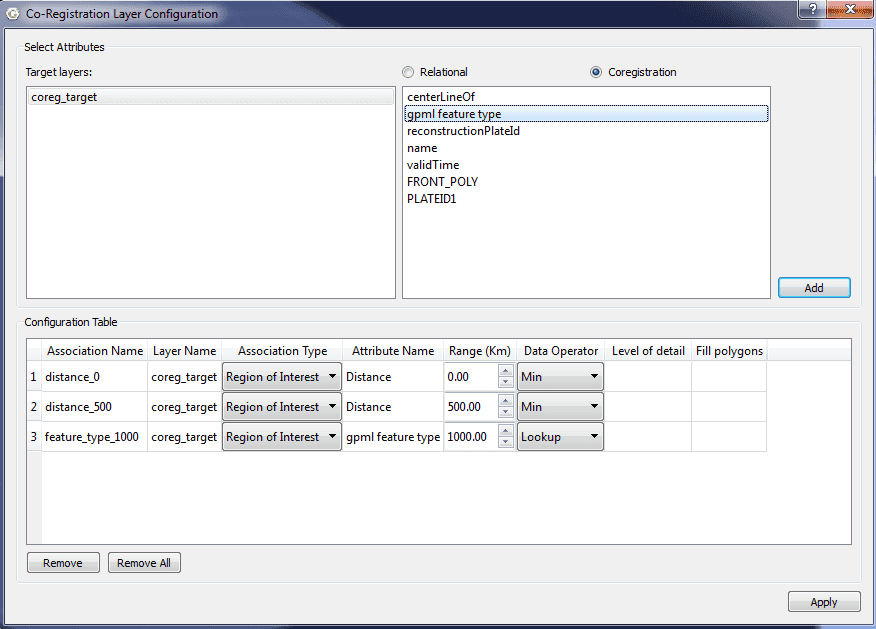
Click the "Co-registration Configuration" button to bring up "Co-registration Configuration" dialog.
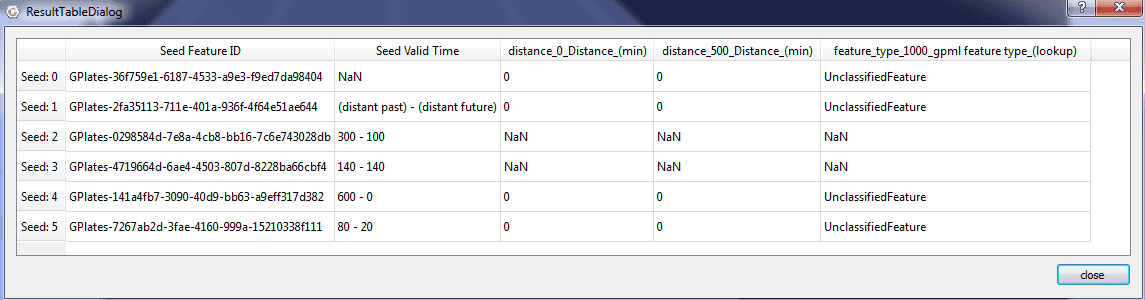
2.3 Result Table
Click the "View Result" to bring up the "Result Table" dialog.
3 Network Interface
The co-registration layer data can be accessed through a network interface. When GPlates starts up, an internal tcp/ip server is initialized. Users can configurate the server setting in "Preference" dialog.

3.1 gplates.py
The gplates.py module is a wrapper around the network interfaces. Users can retrieve data from GPlates by calling Python methods defined in gplates.py. The class CoregistrationLayer is a delegate of coregistration layer in GPlates.
- get_coreg_seeds(self)
Return the feature ids of seeds as a list.
- get_begin_time(self, feature_id)
Given the feature id, return the begin time of the seed.
- get_coreg_associations(self)
Return users defined associations as a list.
- get_time_setting(self)
Return the time setting in GPlates as a tuple.
- get_coreg_data(self, time)
Given a time, return coregistration data as a table.
|
|
|


